Pandian
Pandian is an debian-based armhf desktop and CLI distro for your Pandora. Ideas, Bugs, or feature-requests? Report to: https://www.evilbrain.de/review/index.php?project=4
Contents
- 1 Main Features
- 2 Pandian - MARK 2 The newest release
- 3 Mounting internal NAND to /mnt
- 4 Old releases
Main Features
- The debian way.
- Access to all packages from Debian software repositories.
- Pandian hosts its own Debian repo http://pandian.openpandora.org with up to date scripts, all settings and extra programs.
- armhf-build, which means float operations are relegated to special hardware rather than taxing the main cpu with them (as with softfloat)
Pandian - MARK 2 The newest release
Second version of Pandian
Full Debian GNU/Linux based on sid branch with LXDE desktop environment (normal) or CLI (minimal-) build.
hardfloat armv7l yule release Date: 29.12.2013
forum link
Installation requirements
- Pandora ;) All versions fine?
- SD card minimum 2GB ( was tested with 4GB )
- PC Linux|GNU, BSD, Mac, or Windows for putting the install on the aforementioned SD-card.
Download a version of Pandian
There are two different versions of the "MARK2" release:
| Version | Description | Includes | Link | Size | Checksums (sha256) |
|---|---|---|---|---|---|
| base | pandian for advanced users, without any Desktop environment but with basic network-tools ( iw, ceni ) | ceni ( network-manager) network-manager MediaPlayer ( mpd ) iw (wireless-tools) | filedropper: pandian-mark2-base-hf2014-01-05.7z pandian.openpandora.org: pandian-mark2-base-hf_2014-01-05.7z |
161MB | pandian-mark2-base-hf_2014-01-05.7z↓ b11ffe9cc4fd6111775d0b48c133b1e1afcf6865de784b9865db0cea29674d85 pandian-mark2-base-hf_2014-01-05.img↓ c1903423a5b5e0d04563f14526e8161fbe77a102e64d5d571bcf3b87870fa211 |
| normal | pandian for regular users, with full Desktop environment (LXDE) | network-manager MediaPlayer ( mpd with gurlp ) nub-support calibrator-application medit Text editor. mpd audio player backend, glurp as frontend | filedropper: pandian-mark2-hf2014-01-02 pandian.openpandora.org: pandian-mark2-hf_2014-01-02.7z |
394MB | pandian-mark2-hf_2014-01-02.7z↓ 3731d70a4d8ec59e79a046f34f69c5c809be73e38cfc91a5b580478b8f8c222f pandian-mark2-hf_2014-01-02.img↓ 83b8d3fa5bd0588cfb8b11cfe6b827819e6311e98396a6e32c46c9692f072e96 |
Notes:
- It is trivial to change from LXDE to Xfce (or any other desktop environment), adding a new user interface atop the minimal install is more advanced as manual setup of USB-Networking or wifi is needed to do so.
- All images have automount ( for USB-Sticks, external Hard-Drives etc. ) and ALSA sound support
Verify that your download is OK
- After you download the version you picked, verify its checksum to make sure the integrity of the downloaded file matches (in being an exact copy the one on the server)
- open up a terminal
- "sha256sum ~/downloads/pandian/<image.7Z>" (input where you have the file and the one you chose to download)
- make sure it matches the given md5sum, if not, try to download another copy. This step isnt mandatory, but its there to make sure everything is fine before we proceed.
Unzip the downloaded image
- Unzipping 7z archives
- Open up a terminal (or do it your way)
- Enter"7zr e <image.7z>"
- You now have an unzipped image
(Optional) Preparation, find out where to install
This step helps you find out where the SD card is mounted.
If you have an build in SD-Card-Reader this is normally /dev/mmcblk0p1 ( in Debian ) If you have an USB-Card-Reader this is something like /dev/sdc ( in Debian )
- Open an Terminal and input "lsblk"
- You will get a list with the actual Block-Devices
- The SD-Card should be of type 'disk'
You can also try gparted to see which devices you have and identify the SD-card from there
Install the image to the SD-Card
| Warning, this will destroy everything on the device ! So please be very sure which device is you SD-Card ! |
- Here it will be /dev/sdx
(note that the x after the sd is the drive letter, it could be sdb sdc or sdd and so on, lets say its sdc. Which means c is the drive letter for the SD-card and that sd- a and -b are in use for other things.
When writing to the device, make sure not to include the following number, which is the partition sdc1 sdc2 etc. since we are using the base card here)
This means considerations for partitions and filesystem are taken care of, so no need to worry about that. Do not pick the wrong drive however, since dd will happily write the image to somewhere it isn't supposed to if you just give it root privileges and hit enter.)
- Copy image to SD-Card with "dd if=<image.img> of=/dev/sdx"
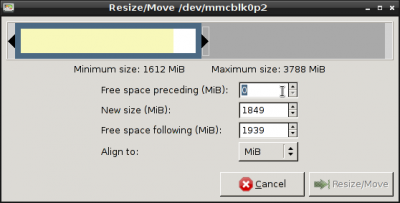
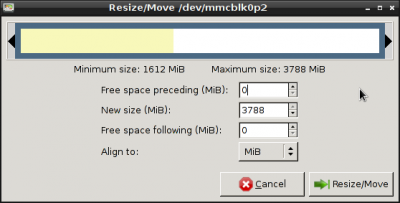
You now have Pandian installed on your SD card and its ready to go. :) However after copying the image to the SD-Card resizing the partitionspartitions is needed to fully utilize the space, since by default the install is limited to 2GB. (If your card is bigger Pandian is still limited to those 2GB)
(Optional) Resize SD-Card
- This can be done with gparted on linux|gnu
- start gparted
- After everything is fine, you have a fresh install of Pandian on you SD-Card
Startup wizard
- Upon first boot of Pandian, there is a first-start-wizard which guides you through some basic settings.
These are: Locale, timezone, time and date, password for admin and user setup and finally calibration of the touchscreen. The script is located in /usr/sbin/pdSetup should you need to run it again.
- Inside a dialog you can navigate with the cross/dpad
- Hit space to select a checkbox
- Moving between <Ok> and <Cancel> can be down with the use of TAB ( Tap Fn then tap Space )
- Acknowledge with Enter
- All done, enjoy :)
Network connection instructions:
normal
- Use network-manager
minimal
- Use ceni network manager
(Optional) Update of Pandian system
- After you setup your Pandora, it is useful to update your system. It is a rolling release, which means since the image was made, the system is forever updated with new packages.
- open a terminal
- get root ( command is: "su" )
- enter "apt-get update" to download package information from the repositories
- enter "apt-get upgrade" to update all packages that are out of date
(pandian packages are also updated this way :)
- Note: to update only the pandian-packages enter "apt-get install pandian-full"
Up-To-Date Home directory
Normally files inside users home get overwritten ( if you say yes ) during upgrade.
Since an change of this behavior, files inside the users home don't get changed anymore by pandian packages.
Now settings of fluxbox and xinit/xinitrc are links. So The user can just unlink some of the settings and write there own, without getting overwritten from an upgrade.
To get up-to-date with the fixes in pandian, you can initialize the home directory to default state.
To do this, just run in an terminal ( as USER ):
- cp -a /etc/skel/. /home/<YourUserName>/
Upgrade Warnings
- if mpd is running, upgrade will fail. How to fix this:
- Open an terminal
- Login as root ( command "su" )
- Enter root password
- stop mpd with: /etc/init.d/mpd stop
- Kill it ( to be sure ): killall mpd
- upgrade again: apt-get dist-upgrade
Upgrade from "minimal" to "normal"
It is possible to upgrade from the "minimal"-image to the "normal"-image. This can simlpy be done by installing the pandian-lxde debian package
- get an connection to the internet(tm) with ceni
- open an terminal
- get root ( with command: "su" )
- update package list with: "apt-get update"
- install pandian-lxde with "apt-get install pandian-lxde"
- after everything is finished login with the user you setup before
- open an terminal
- get root ( with command: "su" )
- load keymap with "xmodmap /etc/skel/.pndXmodmap"
- the easiest way is to activate the first-start-wizard with "insserv firstuse"
- reboot and go through the wizard
(Optional) Information
Additional Users/Groups
There are additional Users/Groups added to the standard debian-users
Groups
- admin
- This superuser privilege is used by sudo for admin task like shutdown etc.
- mpd
- This user/group has access to mpd-related files ( socket, pid-files )
Power-Modes
LID-Close
- If the lid is closed only the screen will be disabled
Low-Power-Mode / Shutdown
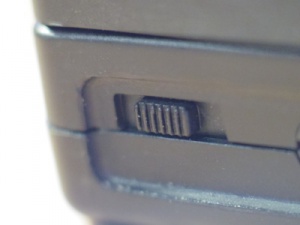
- Switch to left: Pandora will go to low power mode ( reduce CPU, Disable LID, Pause processes )
- Switch to right: Shutdown the pandora
pdcmd
- This script handles all system-related stuff, like lid, low-power, usb or wifi.
- This should run as root
Usage:
| Command | What's done |
|---|---|
| /usr/sbin/pdcmd LCDBright + | Increase the light of the lid |
| /usr/sbin/pdcmd LCDBright - | Decrease the light of the lid |
| /usr/sbin/pdcmd LCDBright 10 | Set the Brightness of the lid to 10 |
| /usr/sbin/pdcmd LCDTrigger | Trigger the lid ( WARNING: THIS DISABLES THE LID ! ) |
| /usr/sbin/pdcmd USBNetTrigger | Enable the USB-Networking (module g_ether). If usbnetworking is on, it will disable it |
| /usr/sbin/pdcmd USBHostTrigger | Enable the USB-Host (module ehci-hcd). If USB-Host is on, it will disable it |
| /usr/sbin/pdcmd WLANTrigger | Enable Wifi. If Wifi is enabled it will be disabled |
Several tweaks
Fluxbox
Fluxbox is the actual Desktop Environment for pandian. It is simple fast and easy to configure.
You can setup your own menu-entry's for fluxbox:
- open an terminal ( or an editor ) as root
- create a new file in ./fluxbox/menu-mymenu
( Note: the menu -filename must be named menu-* )
- run: "gen-menu-fluxbox <username>" as normal user, to generate the menu-file
- your new menu is ready for use
autostart
You can setup your own autostart script in ~/.fluxbox/startup-* for example you can use: ~/.fluxbox/startup-mystart Nothing else must be done, just logout and login to test it ( or reboot )
Fixing broken keyboard layout
If your Pandian has a German keyboard layout, you might have some trouble because it does absolutely not fit US layout on the Pandora. There is a work around this isse.
- Make sure, the file .pndXmodmap is read in on startup. Open the file .xsessionrc in your home directory and, if not existent, add following lines at the bottom of the file
 setxkbmap en_US
 xmodmap /home/yourUsername/.pndXmodmap
- There must be the absolute path (no "~/").
Making the Pandora Button work like the Windows key
Many users complained, their Pandora Button has no function in Pandian. This can be changed by mapping the button as "mod4".
- Insert in the last line of the .pndXmodmap from your home directory:
add mod4 = XF86MenuKB
Openbox
Pandian comes with an unconfigured Openbox as a possible session. Here are some config templates.
- If not existent,
cp /etc/xdg/openbox/rc.xml /home/yourUserName/.config/openbox/
- Open the rc.xml with a text editor and search for the section <keyboard>.
- Insert the new keybind:
 <keybind key="XF86MenuKB">
     <action name="ShowMenu">
       <menu>root-menu</menu>
     </action>
 </keybind>
Intuitive Openbox configuration template
Prerequisites:
- mapped 'Pandora key' as 'Windows key'(see above)
- optional: use tint2 as panel
Features:
- Changing window by [Ctrl] + [up]/[down]
- Changing workspace by [Ctrl] + [left]/[right]
- Closing window by [Ctrl] + [Q]
- Screenshot (window): [Ctrl] + [Shift] + [Alt] + [F11]
- Screenshot (whole desktop): [Ctrl] + [Shift] + [Alt] + [F12]
- and some more
Download: rc.xml
Features:
- Most important programms in root menu
- menu entries for WLAN, USB host and low power mode
Download: menu.xml
Mounting internal NAND to /mnt
Pandora internal NAND exposes a raw flash interfaces. For such devices, the Linux kernel exposes a special MTD abstraction and "mtd aware" filesystems may give a better performance. Pandora uses UBIFS, which needs UBI volume management to work.
- Install mtd-utils
- Run the following commands
# Attach mtd device 4 to UBI volume management 0
ubiattach -m 4 -d 0
# Mount first partition of the UBI group 0 to /mnt
mount -t ubifs /dev/ubi0_0 /mnt
# Attach mtd device 3 to UBI volume management 1
ubiattach -m 3 -d 1
# Mount first partition of the UBI group 1 to /mnt
mount -t ubifs /dev/ubi1_0 /mnt/boot
Old releases
Mark2 minimal-hf2014-01-02
| Version | Description | Included | Link | Checksums (sha256) |
|---|---|---|---|---|
| minimal | pandian without any Desktop environment but with the basic pandian package | nano | filedropper: pandian-mark2-minimal-hf2014-01-02 pandian.openpandora.org: pandian-mark2-minimal-hf_2014-01-02.7z |
pandian-mark2-minimal-hf_2014-01-02.7z↓ a35106473e54c55d64c7eae2088d8c267b605baf17d5338b8e2938dbfe3c01ca pandian-mark2-minimal-hf_2014-01-02.img↓ c68a42c1aef0238c1dd6ff33b628a2c0dea812a7b5b2d906afb185f93f940f84 |
| minimal-networking fix | HotFix for pandian-mark2-minimal-hf_2014-01-02 Instructions | dhcp, network manager | filedropper: pandian-mark2-minimal-networking_2014-01-02.tar.gz pandian.openpandora.org: pandian-mark2-minimal-networking_2014-01-02.tar.gz |
pandian-mark2-minimal-networking_2014-01-02.tar.gz↓ 4cf802391360e5bf183e9d4b5fe8b6f407b3e476baec7b5b0aa7340796680ae6 |
Network Fix for pandian-minimal
If you download the pandian-mark2-minimal-hf_2014-01-02 image there is a lack of tools for setup wifi networking.
Note: For the actual download of pandian-minimal, wifi-network-tools are included
- Therefore download the fix and place it on the SD-Card where pandian is installed. (you need to have local superuser privileges on your own system as the SD contents aren't owned by your user)
- Boot pandian-minimal
- login with user: "root"
- switch to root-directory: "cd /"
- untar the network-fix: "tar -xf /path-where-file-is-located/pandian-mark2-minimal-networking_2014-01-03.tar.gz"
- setup the fix with command "pdMinimalNetwork"
- after the script is finished, run "ceni" and setup your wifi-connection
01
Full debian GNU/Linux 7.2 codename Wheezy (stable) with LXDE desktop environment
hardfloat armv7l released Date: 29.09.2013
forum link
Features
- Hard-Float-ABI
- Ext4 Root for better performance
- Working Touch-Screen
- Working Nubs
- Screen-Off on LID-Close
- Low-Power-Mode
- WLAN
- Music ( with Sonata/MPD )
- Automount
Upcoming/Ideas
- Assistant for tzdata
- libpnd - PND-Support
- OpenGL not tested yet
- Aptitude
- Minimal-Network-Installation
- Pandian-Debian-Repository for special packages ( libpnd, touch-screen-calibrator )
- of course, in-system-documentation ( Documentation on the pandora )
Download here
Installation
note: It is assumed here, that the card-reader load the card as /dev/sdc. Please check before which device is your SD-card ! This can be checked with gparted. Minimum requirement 2GB SD-card.
- Download Image ( as 7z )
- Verify md5-checksum:
pandian-stable-hf_2013-09-29.001.7z 2a85bbb40bbe7c6e8f92f058e150951a
pandian-stable-hf_2013-09-29.001.img e62d101dc708de49af1ca7743e2df2bd - Unzip with 7z ( in Linux with 7zr e <image.7z> )
- Copy image to SD-Card ( dd if=<image.img> of=/dev/sdx ) Don't specify "bs="
Username: Pandian
Root password: Root (change after intsallation as per instructions below)
- Open a terminal
- Type "su"
- Type "passwd"
- Enter your new root password when prompted, and then again to confirm.
- Dont forget your password
Resize
Default installation is limited to 2GB, if you want to expand it, you can, provided you have installed it on a bigger SD-card and want to make use of the space.
- Size will be changed with parted
- parted /dev/sdx
- show size with "print free"
- (parted) print free # Model: USB Mass Storage Device (scsi)
- Disk /dev/sdc: 7965MB# Sector size (logical/physical): 512B/512B# Partition Table: msdos
| Number | Start | End | Size | Type | File system | Flags |
| 32,3kB | 1049kB | 1016kB | Free Space | |||
| 1 | 1049kB | 53,5MB | 52,4MB | primary | fat32 | |
| 2 | 53,5MB | 1933MB | 1879MB | primary | ext4 | |
| 1933MB | 7965MB | 6032MB | Free Space |
we would like to resize the second partition to the nearly end ( -512MB for swap )
- (parted) resizepart # Partition number? 2 # Warning: Partition /dev/sdc2 is being used. Are you sure you want to continue?# Yes/No? YES # End? [1933MB]? 7453MB this is how the partitions looks like after
(parted) print free * Model: USB Mass Storage Device (scsi)* Disk /dev/sdc: 7965MB* Sector size (logical/physical): 512B/512B* Partition Table: msdos
| Number | Start | End | Size | Type | File system | Flags |
| 32,3kB | 1049kB | 1016kB | Free Space | |||
| 1 | 1049kB | 53,5MB | 52,4MB | primary | fat32 | |
| 2 | 53,5MB | 7453MB | 7400MB | primary | ext4 | |
| 7453MB | 7965MB | 512MB | Free Space |
create Swap (optional)
(parted) mkpart primary linux-swap Start? 7453MB End? 7965MB
this is how the partitions looks like after
(parted) print free * Model: USB Mass Storage Device (scsi)* Disk /dev/sdc: 7965MB* Sector size (logical/physical): 512B/512B* Partition Table: msdos
| Number | Start | End | Size | Type | File system | Flags |
| 32,3kB | 1049kB | 1016kB | Free Space | |||
| 1 | 1049kB | 53,5MB | 52,4MB | primary | fat32 | |
| 2 | 53,5MB | 7453MB | 7400MB | primary | ext4 | |
| 7453MB | 7453MB | 278kB | Free Space | |||
| 7453MB | 7965MB | 512MB | primary | Free Space |
disregard the 4th entry, the new resized partition is the last one.
resize filesystem
- resize2fs /dev/sdc2
create swap
- mkswap /dev/sdc3
