Difference between revisions of "Audio system"
(→minijack port: Added a fix for using newer TRRS headphones. Breaks mic compatibility though.) (Tags: mobile edit, mobile web edit) |
|||
| (3 intermediate revisions by 2 users not shown) | |||
| Line 17: | Line 17: | ||
===Headset Compatibility=== | ===Headset Compatibility=== | ||
*At first glance, Nokia headsets are compatible.[http://boards.openpandora.org/index.php?/topic/245-four-conductor-headset-alsa-setting-asoundrc/] | *At first glance, Nokia headsets are compatible.[http://boards.openpandora.org/index.php?/topic/245-four-conductor-headset-alsa-setting-asoundrc/] | ||
| − | *Apple, LG and Samsung | + | *Apple, LG and Samsung don't work correctly, since the mic and ground pins are reversed. If you don't care about using a mic you can fix this by shorting them out with solder - they're labeled 3 and 4 in the hacking guide. |
== Adjusting volume == | == Adjusting volume == | ||
| Line 54: | Line 54: | ||
=== Microphone testing === | === Microphone testing === | ||
[[File:Micfunnel.jpg|thumbnail|Closeup of microphone funnel]] | [[File:Micfunnel.jpg|thumbnail|Closeup of microphone funnel]] | ||
| − | #"arecord -f cd -D | + | #"arecord -f cd -D hw:0,1 lolcat.wav" <br /><br /> |
| − | #ctrl+ | + | #ctrl+c<br /><br /> |
#"aplay lolcat.wav" you should now hear what you recorded. | #"aplay lolcat.wav" you should now hear what you recorded. | ||
| − | |||
=== other soundcards === | === other soundcards === | ||
| Line 137: | Line 136: | ||
This is a general information page for the various applications of MIDI on the Pandora. | This is a general information page for the various applications of MIDI on the Pandora. | ||
| + | |||
| + | ==Doing things with sound== | ||
===Game music=== | ===Game music=== | ||
| − | + | [[image:AudioProduction.jpg|thumb|Audio production on pandora]] | |
Many games make use of MIDI background music. Generally these are PC ports like Doom, Warcraft, Dune 2, ROTT, the Zelda remakes, Albion and more. To enable music in these games (as directed by their documentation), install the [http://repo.openpandora.org/?page=detail&app=timidity-midi-installer-19487 Timidity MIDI installer]. It provides the sound and configuration required to enable MIDI background music. | Many games make use of MIDI background music. Generally these are PC ports like Doom, Warcraft, Dune 2, ROTT, the Zelda remakes, Albion and more. To enable music in these games (as directed by their documentation), install the [http://repo.openpandora.org/?page=detail&app=timidity-midi-installer-19487 Timidity MIDI installer]. It provides the sound and configuration required to enable MIDI background music. | ||
Latest revision as of 10:03, 6 September 2017
This page is intended as a collection of all things audio.
Burr-Brown PCM1773 DAC and the Texas Instruments TPA6110A opamp. It runs on its own isolated power supply and even has a proper line out via the EXT connector on the back
Contents
Audio Features
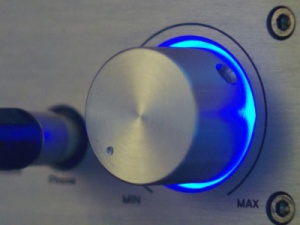
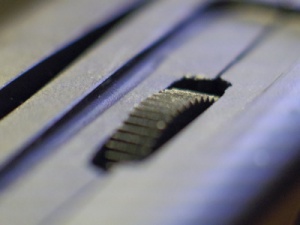
The Pandora has a high quality Digital to Analogue Converter (DAC). The sound signal from the processor is passed to an analogue amplifier, and at this point a signal from the volume control wheel is applied (so the OS has no visibility of the volume wheel, you have a final physical control over the volume). There is a built in microphone (on the right hinge), and a multi-terminal 3.5mm jack. Plugging in to the jack will disconnect the internal speakers. Note that ipod specific headphones use a different pin-out and are not compatible with the Pandora. Normal stereo headphones are compatible.
minijack port
4 pins à ø=3.5mm -minijack. This input allows you to plug in standard headphones, or a headset (headphone + microphone)
See http://www.openpandora.org/downloads/PANDORA_Hackers_manual_v100.pdf page 18.
OMTP TRRS standard, you can use an adapter if you want to plug in CTIA headsets.
Headset Compatibility
- At first glance, Nokia headsets are compatible.[1]
- Apple, LG and Samsung don't work correctly, since the mic and ground pins are reversed. If you don't care about using a mic you can fix this by shorting them out with solder - they're labeled 3 and 4 in the hacking guide.
Adjusting volume
Passive potentiometer based volumeadjustment.
Resampling to adjust volume
Boosting the volume in this way is strongly discouraged. From urjaman[2]: If you want to over-amplify (will crackle if you overdo it == play loud recording with high volume) the audio with the software volume control (eg. I just watched firefly with my Pandora and really couldn't hear it properly with the integrated speakers because it was too quiet recording), modify .asoundrc(add the + line, without the +):
pcm.softvol {
        type softvol
        slave {
                pcm     "dmixed"
        }
        control {
                name    "Master"
                card 0
        }
+       max_dB 12.0
}
You can change the max_dB to suit yourself, but 12 is a good starting value if you have no idea (it's what the winamp preamp allows by default, some audio card drivers, etc). If it's too loud (crackling) after this, you can also just compensate with the XFCE mixer (or alsamixer from terminal) (the analog volume scroll wont fix this).
Speakers
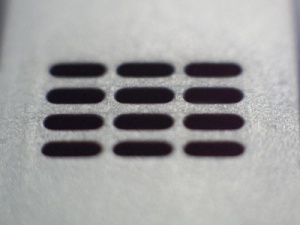
Stereo dynamic speakers embedded in the screen bezel for better audio positioning and response.
Microphone
twl4300-hifi-1
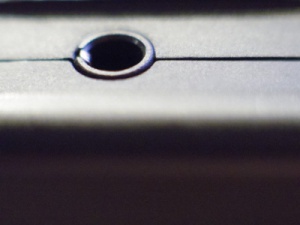
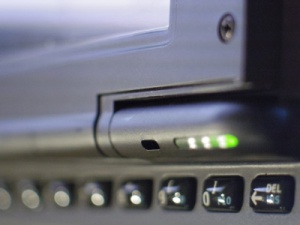
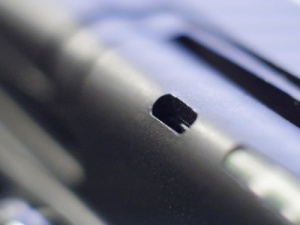
The microphone is up in the right hinge hump in between the 9 and 0 buttons. It can be used with the lid open or closed since it has the hole facing up and slightly in toward the user (somewhat like the power LED).[3] Handled by TPS65950
Microphone testing
- "arecord -f cd -D hw:0,1 lolcat.wav"
- ctrl+c
- "aplay lolcat.wav" you should now hear what you recorded.
other soundcards
(example made on regular desktop PC)
\arecord -l
**** List of CAPTURE Hardware Devices ****
card 0: SB [HDA ATI SB], device 0: ALC889A Analog [ALC889A Analog]
  Subdevices: 1/1
  Subdevice #0: subdevice #0
card 0: SB [HDA ATI SB], device 1: ALC889A Digital [ALC889A Digital]
  Subdevices: 1/1
  Subdevice #0: subdevice #0
card 0: SB [HDA ATI SB], device 2: ALC889A Analog [ALC889A Analog]
  Subdevices: 2/2
  Subdevice #0: subdevice #0
  Subdevice #1: subdevice #1
card 2: Microphone [Yeti Stereo Microphone], device 0: USB Audio [USB Audio]
  Subdevices: 1/1
  Subdevice #0: subdevice #0
To test "Yeti Stereo Microphone", I see that it is card 2, subdevice 0. arecord will use hw:2,0 .. aplay will still use hw:0
 \arecord -D hw:2,0 -f cd |\
 \aplay   -D hw:0   -f cd
Recording
How to enable audio recording by MWeston:
- In the mixer control utility, select SELECT CONTROLS and enable 'Left Input Source' and 'Right Input Source'
- under the OPTIONS tab, set Left Input Source to MAIN MIC (for internal mic) or LINE IN when A/V cables are available
- Set Right Input Source to SUB MIC for use with four conductor headset or to LINE IN when A/V cables are available
- Under CAPTURE tab, increase the level to whatever is necessary (start at midpoint)
- Under the PLAYBACK tab, increase the INPUT BOOST to whatever is necessary (start low!)
- open a terminal window and type:
arecord -f cd -D hw:0,1 | aplay
This will play the input through the speakers. It has a good half second delay but you can still get into some interesting feedback loops if you're not careful.
- to record the input devices to a file, move to an SD card directory (strongly don't recommend writing to NAND as you know) and type:
arecord -t wav -f cd -D hw:0,1 test.wav
(call the file whatever you want and you could also type the full path to SD card here too)
- then listen to it with:
aplay test.wav
Using Audacity
If you don't want to muck around with terminal commands, you can download Audacity and record with that (you can also do multitrack recordings).
- in mixer controls (the little icon on your taskbar), choose 'select controls' and then tick 'left input source' and 'right input source'
- then in the main screen you should now see a new tab called 'options'. Click on it.
- For "left input source" choose "main mic" (that's Pandora's in-built microphone - the little hole above number "0")
- For "right input source" choose "line in"
- Now open Audacity, go to Edit->Preferences and change "recording device" to "hw:0,1". Also set it to "mono" (not "stereo")
- Now close the preferences, click the big red button, and it should start recording. You can also record over-top of your previous recording, and you can listen with headphones to your old recording while you're recording a new one on top of it. WARNING: If you click on anything outside the Audacity window, the recording will stop.
Boing
From time to time you hear a noise from your active Pandora, which sounds like "Boing", for about half a second, regardsless of what activity you just perform on it.
This is not a software related sound effect (sample/synth), but rather hardware related:
"The boing is the audio amplifier releasing the remaining power before it shuts itself off." (Source: EvilDragon)
So no need to worry. This will happen every here and then. Also if the volume wheel is set to 0. (Source: porg)
There's no sound!
When you get your Pandora, the volume in the Xfce mixer is set to zero by default.[4][5] Click on the icon with wavy blue lines on the bottom-right side of the taskbar in Xfce, and turn up the volume.
This is a general information page for the various applications of MIDI on the Pandora.
Doing things with sound
Game music
Many games make use of MIDI background music. Generally these are PC ports like Doom, Warcraft, Dune 2, ROTT, the Zelda remakes, Albion and more. To enable music in these games (as directed by their documentation), install the Timidity MIDI installer. It provides the sound and configuration required to enable MIDI background music.
Listening to .mid files
Timidity Daemon & GUI includes a basic player for .mid files. Other audio players may support the .mid format too. Note: The Timidity MIDI installer is a pre-requisite to the Dameon & GUI package. Without it, you will not have sounds or Timidity config present on your system.
Music producers
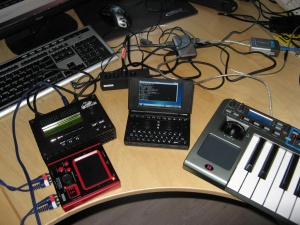
Standard USB MIDI class drivers are included on the Pandora, which means any 'generic' interfaces should be supported. Check the USB compatibility list for information on specific devices. Most USB MIDI interfaces are USB1.1, which means you'll need to use a USB hub. If you do not have any MIDI hardware attached, you will need both the Timidity MIDI installer and Timidity Daemon & GUI. Running the daemon allows Timidity to be seen as an output device by sequencing software, so it can be used for on-board sounds.
What is the difference between the "MIDI Installer" and the "Daemon & GUI"?
The MIDI Installer simply installs patterns (sounds) and a config file. It is all that you need if you only want to enable game music. The Daemon & GUI package is the full Timidity binary compiled for the Pandora. (Note that it will not function without the MIDI Installer being run first.) Why aren't they packaged together? Primarily because the former is a large-ish 40MB PND which you can remove from your card after installing, and the latter is a lighter 600KB PND which you keep on your system. Merging them was discussed, but it was decided that keeping them separate was more flexible for users.
Can I use MIDI via an emulator?
The Atari ST emulator Hatari has been successfully tested running driving hardware synths via USB MIDI interface 12. In theory DOSBox should also be able to drive hardware (such as a Roland MT32) as it does on PC, although this is untested on the Pandora. Feel free to test and add your results to this section.
